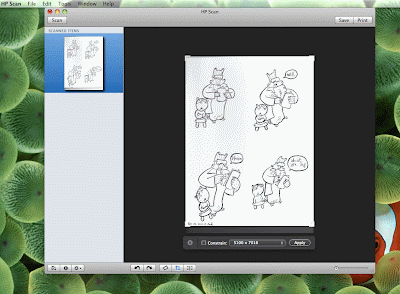
Scan your drawing as a 600dpi TIFF and save it to your desktop (perhaps include RAW in the title to indicate that this is your raw scan).
Open your raw TIFF in Photoshop.

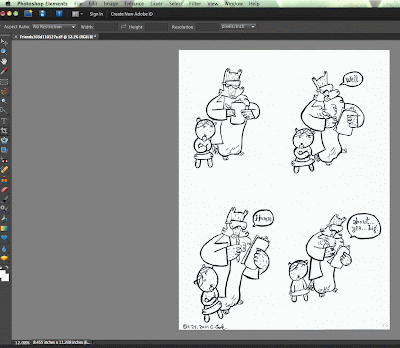
To prepare TIFF for web (in this case for our class blog): Select crop tool from palette at left. At top set "width" to 800 pix and "resolution" to 72 pixels/inch. Use crop tool to select entire image, then hit return.

Save it as gif: Type at same time: S, shift, option, and command. You can reduce file size while checking that it maintains image quality. When it looks good, click "OK" or enter to save it.
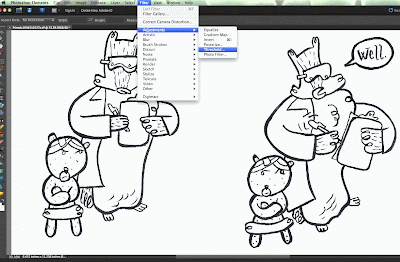
To prepare TIFF for print publication: Reopen original TIFF in Photoshop. Increase image from 600dpi to 1200dpi. (Keys: command, option and I.) Magnify image (Keys: command and +). Select "Filter" menu > "Adjustments" > "Threshold." (I'm using Photoshop Elements here; in regular Photoshop, this may be found in the "Image" menu.
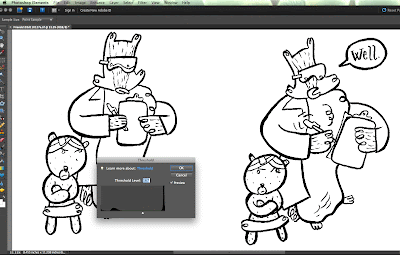
Adjusting the threshold cleans up black and white line art by getting rid of the grays. Slide the arrow in the pop-up menu left or right to adjust how densely black the image is. Click "Preview" on and off to see how your modified image compares to the quality of your original drawing. When satisfied with how it looks, click "OK."
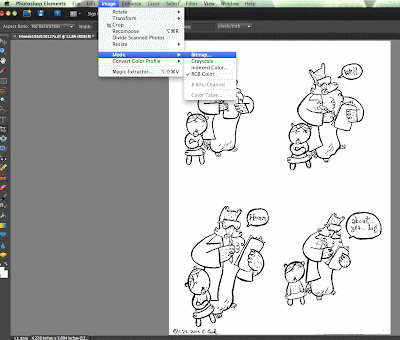
Convert to bitmap by opening "Image" menu > "Mode" > Bitmap. This converts the image to lots of little black or white squares, for a smaller image file, while retaining image quality. (But note it often looks crappy if you try to convert it back from bitmap.)
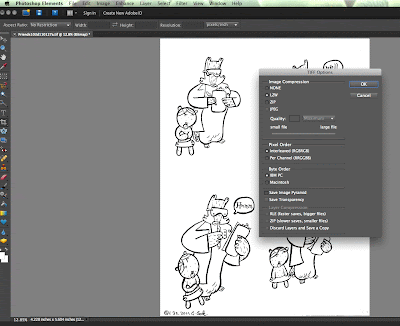
Save as a new file--maybe add FINAL or FIN to the title to make clear that it is your final image. Select LZW image compression and IBM PC Byte Order (hopefully to make this Mac thing more coherent for PCs too).
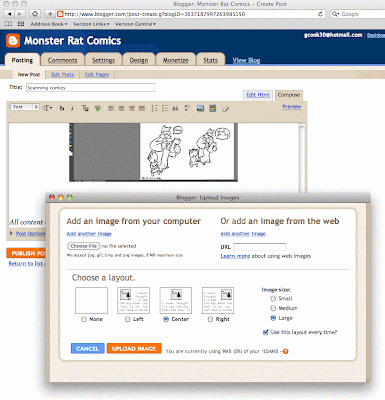
Upload gif to Blogger: Log into blogger. Select "New post." Give it a title. Click image icon at the top right of the post window. In "upload images" pop-up window, click on "choose file," select gif from you desktop, then click "upload image." Image should load into the post window. If all looks good, click "publish post" at bottom left of post window.
All content of this post copyright January 2011 Greg Cook.


